
How to Connect Sanity and Next.js: Finding A CMS Part 1
Read 293 times
#nextjs
#cms
#tutorial
In this article we see how well Sanity plays with Next
I mentioned in a post that I was going to be looking for a CMS for my upcoming projects. One that is efficient at managing the data for the respective sites.
I chronicle the first part of that journey today, with one of the CMSs I mentioned; Sanity
What Is Sanity?
Sanity is a headless CMS that does what a CMS is supposed to do - manage content. With Sanity, you don’t have to worry about starting up or managing a database. They take care of that.
It uses a query language called GROQ (Graph-Relational Object Queries), which we will get to later.
To quote them:
Content is Data Sanity.io is the unified content platform that powers better digital experiences
Getting started with Sanity is a simple as running a script. With the option to begin with a clean project or use one of the many starters other talented developers have made.
Before we jump into the creation part, you will need a few things to follow along:
- The starter I created because I don’t want to recreate the file structure every time
- Node - for the packages we’ll install
- Git - to have our work under version control
The site I am testing with is the basis for a blog. A blog because it encompasses two important things I need:
- Fetching a list of records.
- Fetching the individual content related to those records.
Some Housekeeping
This is a proof of concept article, as such, I was not concerned with styling. Also, this is not a beginner walkthrough - I explain some things others I don’t. However, if you need clarity on why I did something the way I did, I will be more than glad to go more in-depth.
Now to the fun part…
Setup Next
Install Node and Git, then clone my stater:
git clone https://github.com/Psypher1/next-cms-starter.git
Navigate into the directory:
cd next-cms-starter
Then install the dependencies:
npm install
You can rename the folder to something else that suits you
While that happens, head over to Sanity and sign up. We’ll need to login soon. (Github option is simpler)
Most of what we will be doing will be in the blog folder in the src directory of the Next app:
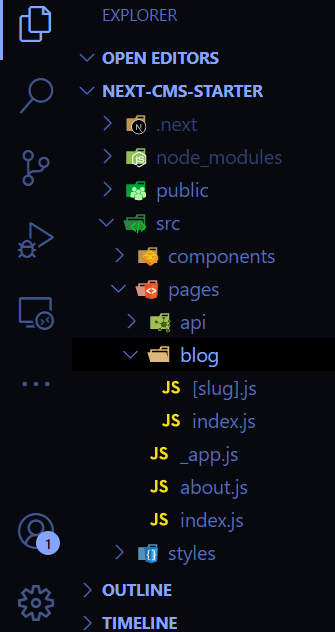
Setup Sanity
Now we install the Sanity CLI
npm install -g @sanity/cli
Initialise your Sanity project and login:
sanity init
This will load up some options, we will choose to Create new project, then give it a name
The Sanity project will be created within your Next app root.
From this point, accept every prompt you get:
- Use the default dataset.
- Accept the path for your project.
You will then be prompted to choose a schema, or start with a clean install. We will choose the Blog Schema
Additional Dependencies
There are a few dependencies we will need, let’s install those now:
Sanity Client - to connect to Sanity
npm install @sanity/client
Block Content - to render rich text format
npm install @sanity/block-content-to-react
image Url - to create cleaner URLs for images
npm install @sanity/image-url
Fire up Sanity Studio
When all that is done, you will see a new folder with the name you chose for your project. Now navigate into that folder with cd <project name>.
Then run sanity start. This will compile everything and build your Sanity Studio.
You can now load up your studio by going to http://localhost:3333
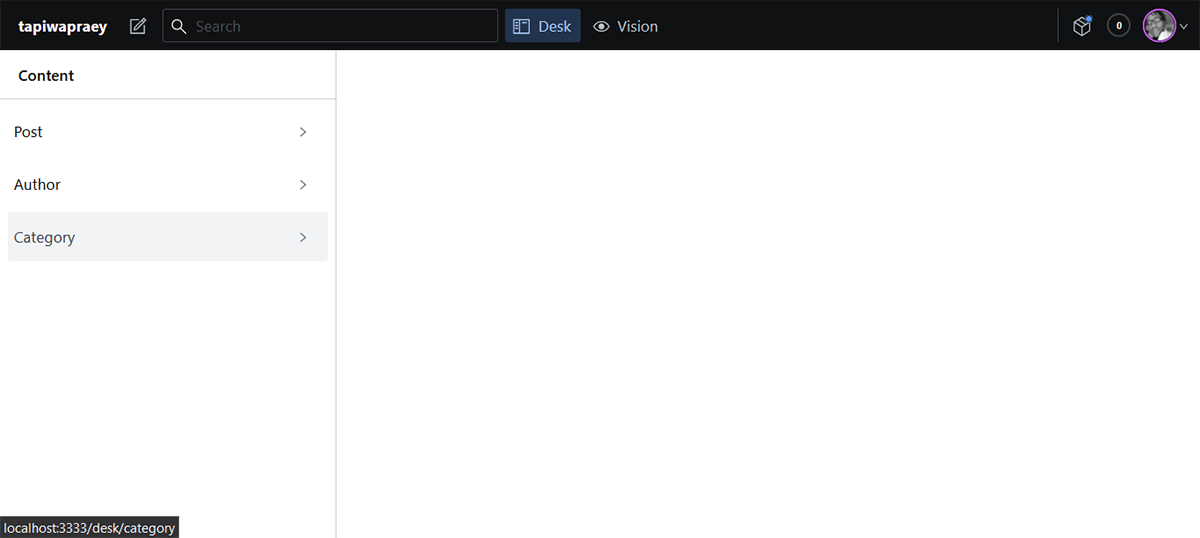
To add data, select any of those sections and fill them in, we’ll make a couple of posts
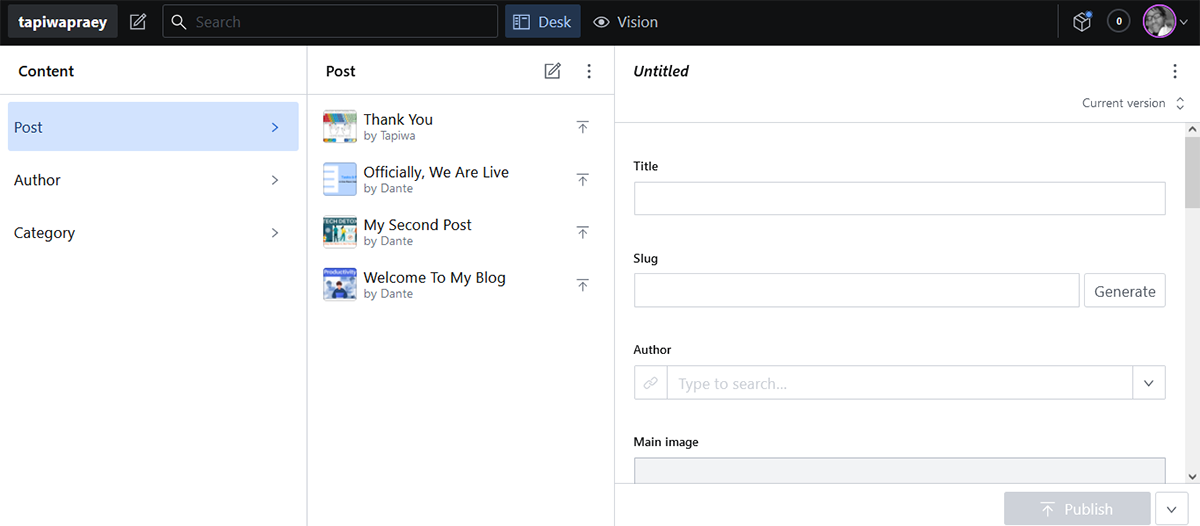
The Vision button at the top of your studio leads to a playground you can use to test your GROQ queries before adding them to your code.
Sanity works with documents and schemas to organise your data. The actual structure of the document schemas can be viewed and modified directly in code.
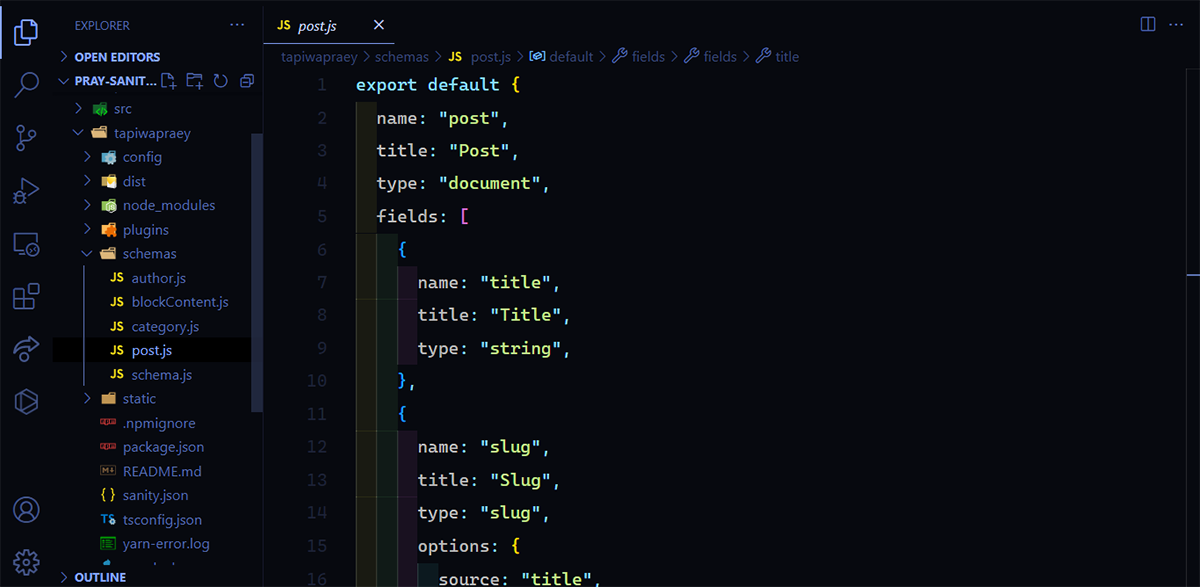
Meaning you can structure the studio and the content you want on your site exactly how you want.
Connecting Next and Sanity
Now we need a way for Sanity and Next to communicate. A way that tells Next how to connect to Sanity and retrieve data. We do this with one of the additional dependencies we installed.
Create a file called sanityClient.js in the root of your Next project (ideally in a lib or utils folder) and add this to it:
import sanityClient from "@sanity/client";

export default sanityClient({
    projectId: "",
    dataset: "production",
    apiVersion: "2021-08-31",
    useCdn: false,
});
Your projectId can be found in the sanity.json file in your Sanity project directory.
With that done, we need to tell sanity about our Next project.
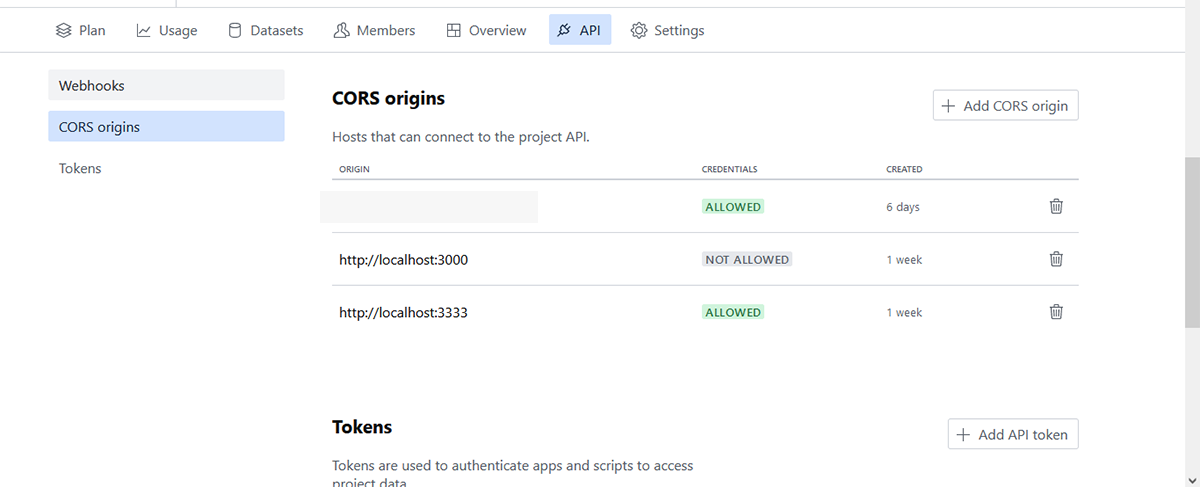
Go to manage.sanity.io in your browser and select the project you made.
You can also find your projectId here
Go to API then CORS origins and include http://localhost:3000/
Pulling Data From Sanity to Next
Now, go to index.js in the blog folder and add this code:
/* ..src/pages/blog/index.js */

//import sanityClient
import sanityClient from "../../../utils/sanityClient";

//fetch data from sanity
export async function getStaticProps(){
    const posts = await sanityClient.fetch(`*[_type == 'post']{
        _id,
        title,
        'slug': slug.current,
        mainImage{
            asset->{
                _id,
                url
            },
            alt
        }
    }`);

    return{
        props{
            posts,
        },
    };
}
Pass the data into the component and load the data:
/* load post data onto page */
export default function Blog({ posts }) {
    return (
        <div>
            <h1>Articles</h1>
            {/* map through posts data and ouput titles */}
            {posts && posts.map((article) => (
                <div className="blog-list" key={article.slug}>
                    <Link href={`/blog/${article.slug}`}>
                        <a className="blog-item">{article.title}</a>
                    </Link>
                    <img src={article.mainImage.asset.url} alt={article.title} />
                </div>
            ))}
        </div>
    );
}
- We use
getStaticPropsto make anasynccall to Sanity. - We then use a GROQ query to pull the post data and specify the fields we want.
- We gave an alias to the slug so it is easier to work with. - that way we can link to the individual post
- We return the results from that query as props.
Resources on GROQ and how the queries work
Now when we start our development server from the Next root:
npm run dev
Navigating to the blog page http://localhost:3000/blog, we should get this:

NOTE: By default when you query posts from sanity, they are ordered alphabetically. You have to make a slight modification to the query to order them differently.
Getting Individual Post Data
As we’ve seen that we can fetch post data, we move on to fetching individual post data.
I have omitted most of the styling so you have a better view of the code. All the necessary classes are there though.
Now, we make use of the other additional dependencies. Move to the slug.js file and add this code:
/* ..src/pages/blog/[slug].js*/

// import sanityClient
import sanityClient from "../../../utils/sanityClient";
//import image url
import imageUrlBuilder from "@sanity/image-url";
//import block content
import BlockContent from "@sanity/block-content-to-react";

// create a function to build the image URLs
const builder = imageUrlBuilder(sanityClient);
function urlFor(source) {
    return builder.image(source);
}
We retrieve all the slugs from our posts:
// fetch post slugs from sanity
export async function getStaticPaths() {
    const posts = await sanityClient.fetch(`*[_type == 'post']{
        'slug': slug.current}
    `);

 // map through slugs and output them as paths
 const paths = posts.map(({ slug }) => `/blog/${slug}`);

 return {
    paths,
    fallback: false,
 };
}
We pass params from getStaticPaths and retrieve post data with the matching slug:
// fetch data matching slug
export async function getStaticProps({ params }){
    const slug = params.slug;

     const [post] =
           await sanityClient.fetch(`*[_type == 'post' && slug.current == '${slug}']{
            title,
             _id,
             slug,
             mainImage{
                asset->{
                    _id,
                    url
                }

             },
             'author': author->name,
             'authorImage': author->image,
             body,
        }`);


     return {
        props: { post },
    };
}
Then we load the data onto the page:
// load post data onto page
export default function PostDetail({ post }) {
    return(
      <div>
        <h2>{post.title}</h2>
        <img src={urlFor(post.mainImage).url()} alt={post.title} />

        // author info
         <div>
            <img src={urlFor(post.authorImage).url()} alt={post.author} />
            <p>{post.author}</p>
        </div>
        // post body
         <hr />
        <div >
            <BlockContent blocks={post.body} />
        </div>

        // useful links
        <hr />
        <br />
        <div className={styles.links}>
           <Link href="/blog">
                 <a className={styles.back}> {"<Back to Blog"}</a>
           </Link>
           <Link href="/">
             <a className={styles.back}> {"<Home"}</a>
          </Link>
       </div>
    </div>
    )
}
in Sanity, the body of your post is represented as an array of blocks; h2, paragraphs, lists. The block-content-to-react package gives us a way to load that data in our Next app and represent it in a meaningful way.
We have also looked at two ways to load images into Nextjs.
If everything is correct, and I did not miss anything. Loading an individual post should get you:

Collaborating
Up to this point, our Sanity Studio has been running locally. To get the best out of it, we have to deploy it - that way we can collaborate.
In the Sanity directory run:
sanity deploy
You will be asked to give your deployed studio a URL. When that is done, your studio is live and you can open it with the URL you chose!
Adding Member
To add collaborators to your studio, head back to manage.sanity.io , choose your project. Select the Members section and invite collaborators.
The number of members you can have on a project is dependent on your plan. The free plan is limited to three.
The beauty of Sanity plans is that you pay for only what you need. I’ll let them speak for themselves:
Pricing Transparent and flexible. Pay-as-you-go for users, usage and features on all plans.
Below is a brief overview of the plans and the members for each one.
| Plan | Price | Members |
|---|---|---|
| Free | 0 | 3 |
| Team | 99 | 10 |
| Business | 949 | 20 |
| Enterprise | Contact Sanity | Contact Sanity |
| Custom | Contact Sanity | Contact Sanity |
In reality, all you will most likely be doing is adding to the Free plan.
Will My Project Update If I Modify The Schema?
When you do make changes to your Sanity project; like adding new schemas etc. Remember to deploy it so the live version matches the local.
A QOL Thing
You can abstract your queries using the groq package. It’s a nice way to make your code more readable.
Scoring
Now for the part you have all been waiting for. How well does Sanity stack up to meeting my and my clients’ needs and goals? Let’s have a look…
1. Ease of Use
For me
For the most part, Sanity is easy to use. I really like that I can structure my schemas the way I want - it’s all in code
For user
When I was done with this test build, I gave a user access to the studio and let them play around.
They said it was straightforward to use, which was really encouraging.
2. How Well Data Can Be Queried
It queries very well actually. If you’re familiar with GraphQL, GROQ won’t be that hard to grasp.
For me, it was getting used to it. But after that, I was able to pull out exactly what I wanted. There is still more to unpack here of course.
3. Ease of integration with Next
To my pleasant surprise, the integration with Next is quite seamless. Usually, I have jump through several hoops just to connect a backend to Nextjs.
Also, some great developers have made some incredible packages that make the melding of the two easier.
A Thing To Note
When you make your frontend live, remember to include that URL in your CORS origins.
4. Time Taken To Production
Based solely on what I built, once the studio is deployed all that remains is the frontend. And that is simply pushing to Github and deploying to Vercel or Netlify
What takes the most time - as I’ve said - is figuring out the specific GROQ query for what you want to pull from Sanity.
5. Support/Community
The Sanity Slack - which I found when encountered issues - is the place to go to for any and every question you may have regarding Sanity.
6. Ease of Deployment
Sanity deploys quite easily as you have already seen. I really appreciate that simplicity.
Conclusion
Sanity was fun to work with. It wasn’t as complicated as I thought to get data from it into Next.
It has done really well in catering to my projected goals.
I do have a question in regards to styling the body content though. I’ll be asking that in the Slack
If you followed along - Thank You - and came across any issues, please feel free to ask me. I will do my best to help you.
Thank you for reading, let’s connect!
Thank you for visiting this little corner of mine. Let’s connect on Twitter and LinkedIn